
installing the electronics #
After putting down the shielding the next step was routing the grounding wires. I installed the wiring, soldered the ground to the tremelo and jack pin. Everything tested correctly with the multimeter.
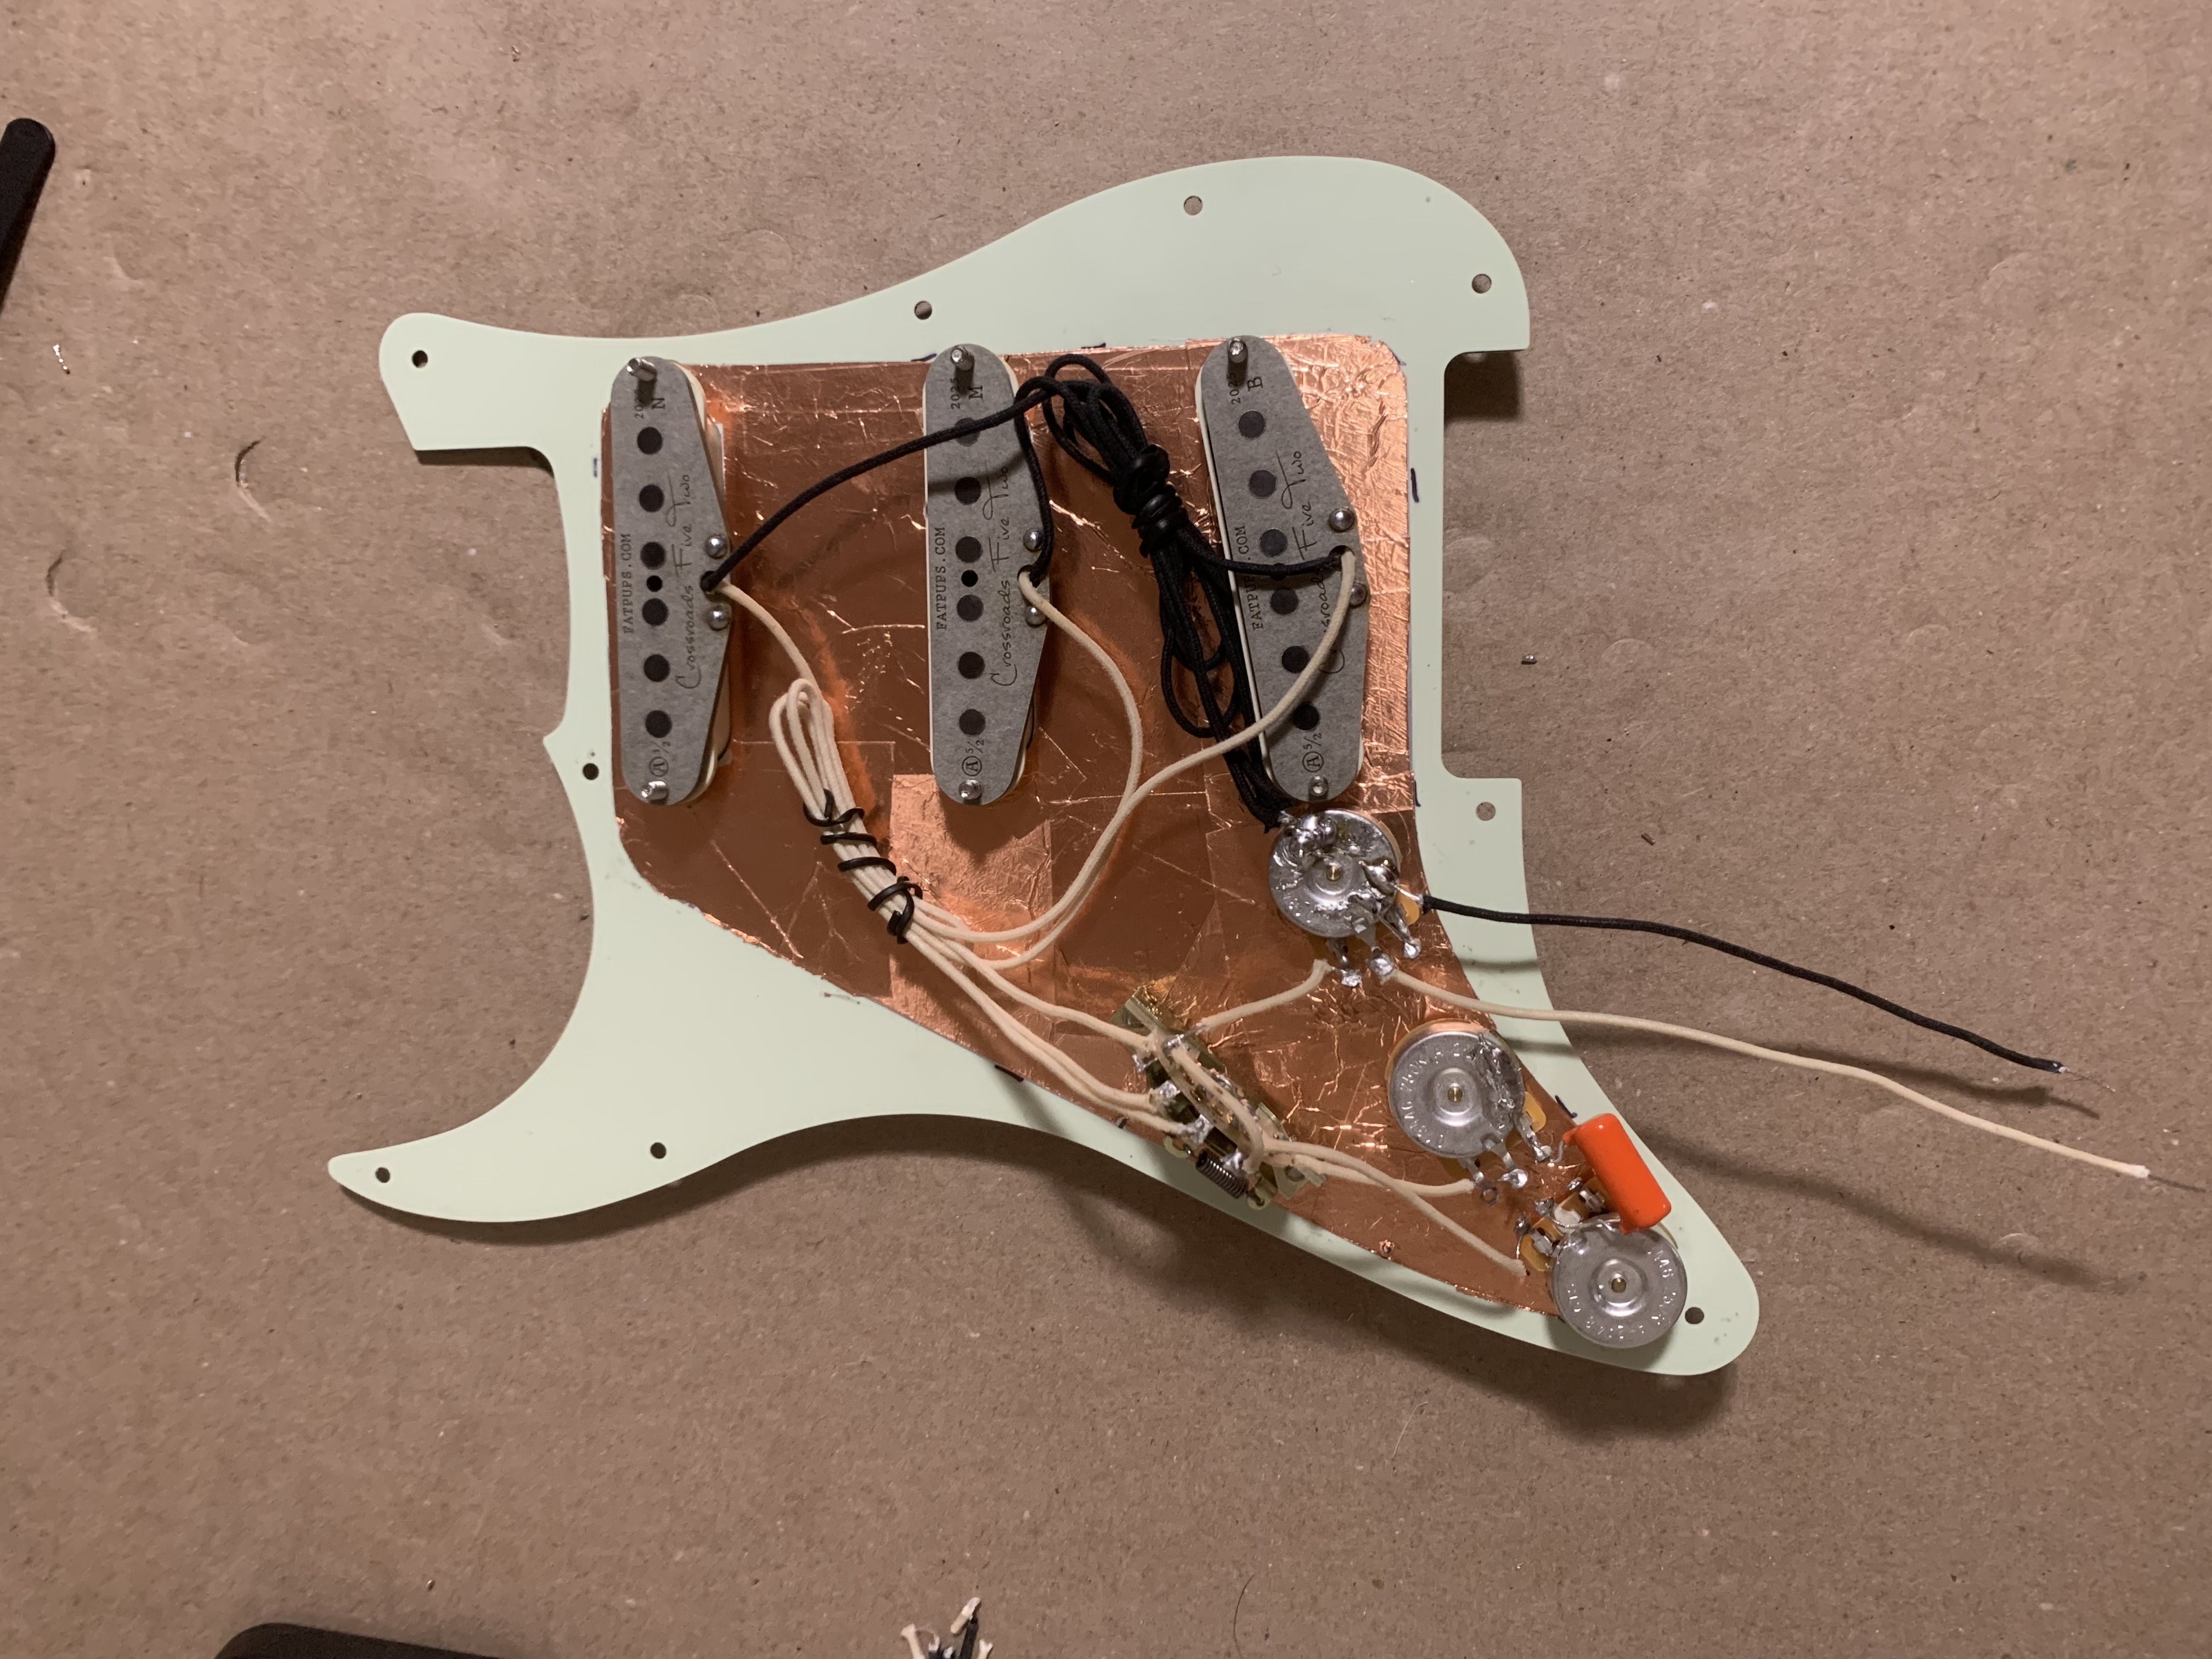
Next the pickups. I went with a set of hand wound, aged, Alnico 5/2, with flat poles. According to the description, the combination of Alnico 5 rods for the low strings, and Alnico 2 rods for the high strings, “creates a smooth, well balanced output… punchy attack with well defined bass response on the lower register and warm swelling vintage tones on the upper register.”
Additionally, “flat pole pickups will have more bass, presence, and slightly more output than a pickup with vintage staggered poles. Typically flat pole pickups will have more balanced output from string to string. The high E won’t be as subdued and the G string won’t overpower the others.”
Okay, you sold me. They installed easily.
soldering, take one, and action #
Now the tricky part, soldering. I went with the layout that came with the pickups, but honestly, there were several different layouts that were interesting to me. More on that later.
I got all of the grounds set, all of the junction wires installed, and wired up the pickups. Everything appeared to test correctly so I put the pickguard on and installed all of the screws. More on that later.
but but, why didn’t I listen to the advice?! #
Several videos I watched mentioned individually testing each of the poles and pots before installing the pickguard. Nope, I was confident everything tested correctly before assembling it, so I didn’t need to do that. I strung it up with my last set of favorite strings, then plugged it in.
Only the bridge pickup worked. Fuck. My last set of favorite set of strings, wasted.
not a stranger to troubleshooting #
Long story short, I was able to isolate the issue. I had over-heated one of the tone pots, which was shorting incorrectly and killing the rest of the route after the first pickup. Costly lesson, each pot is about 12 dollars. I also didn’t trust that I hadn’t killed more in the electronics, so I pulled everything and ordered a prewired electronics kit.
an unplanned upgrade #
The wiring kit I got has two special parts that my original build didn’t. First, it’s wired with an additional capacitor so each tone pot is running through one. From there, it has a treble bleed circuit on the volume pot which helps maintain the treble tone as you roll off the volume (something I don’t do a lot of, but anyway). Finally, the 5 way switch is customized with dedicated bridge pickup tone and separate neck and middle pickup tone. Having control over the middle pickup is one of the more popular strat modifications people mention on Youtube. I’m glad I accidently fucked up the wiring and went with this.

still not bloody right #
You may have noticed in the previous picture that the cavity under the tone pots wasn’t flat like seen in the previous post (or maybe you didn’t notice). Well that’s because after I finished wiring up the new harness, it was about an inch too tall.
After more research I bought a Dremel with several bits. Grind grind grind, reshield the cavity. Nope. Grind grind grind. Okay, that’s enough. Put it back together. Fuck, still doesn’t work.
but but, why?! #
Everytime I would put the pickguard back into the body, as soon as I put any pressure on the top, the signal would short. After more testing on each of the solder joints, the issue ended up being the design of the treble bleed on the volume pot. In combination with the shallow body cavity, the wiring on the treble bleed would ground on the top of the pot. So I added a very small square of cardboard between the pot and the capacitor. Problem solved.
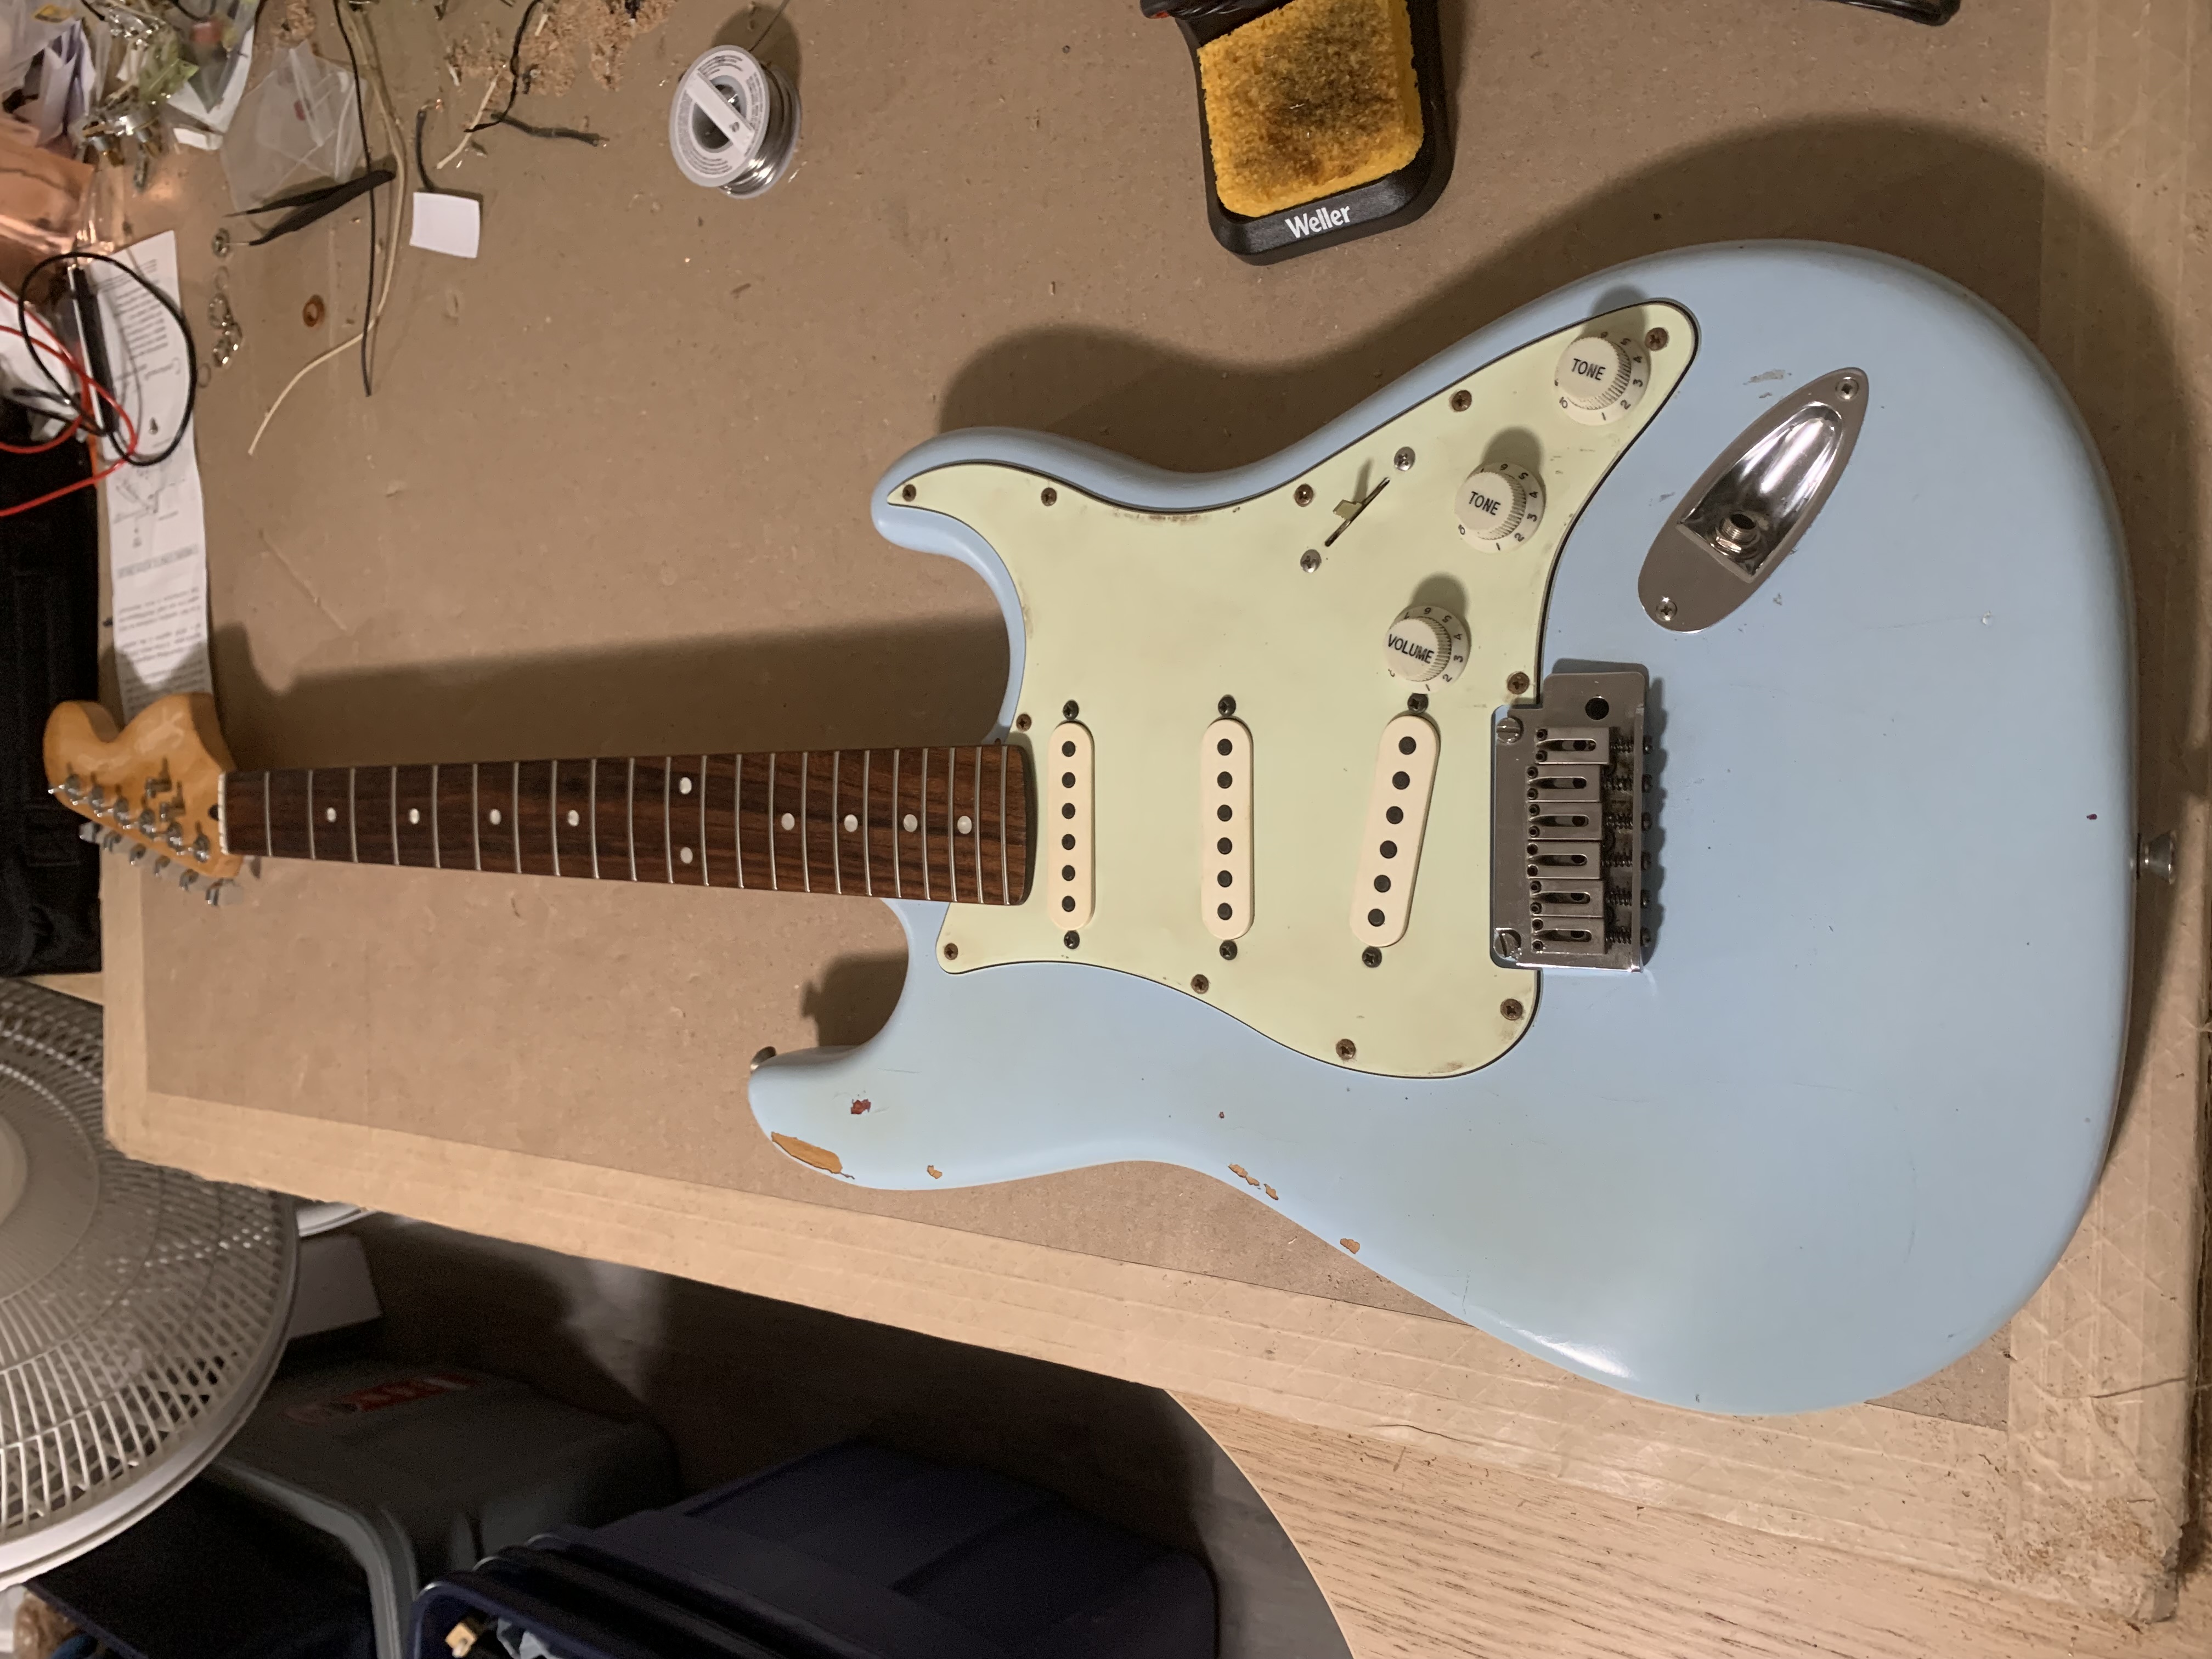
feels goodman #
It’s finally done. After all of the troubleshooting the payoff was great. The sound is so nice and output strong. It plays smoothly and the weight is very nice.
On to the next guitar project, refinishing and rebuilding a Les Paul Jr.